Showing posts with label online Facebook business card creator. Show all posts
Showing posts with label online Facebook business card creator. Show all posts
Monday, 25 November 2013
Create your "Facebook Business Card"
22:24
By
Unknown
Facebook business cards,
how to create Facebook cards,
Moo business cards,
online Facebook business card creator
No comments
Over 800 million Facebook users access Facebook daily like their email. Out of them some are business people who are promoting their business via Facebook by creating "Business Fan Pages".
If the online media is very much attracted to your products displayed in your business page in Facebook, then the display of that should be done on a physical thing that will represent the popularity of your business online.
The physical thing that acts like a card (business card) which shows your Timeline, details about you and your business, etc. This is possible via "Facebook Business Cards".
The image besides displays the proper Facebook business card which has important details like your photo, cover photo, name, location, etc.
Showing your online professional presence using Facebook's Timeline should be made via an "Online Business Card" creator.
And that is done by none other than "Moo" .
Moo.com is a online printing business. Recently they have started creating "Facebook Business Cards" too. These Facebook cards are simple to make, with excellent quality that helps you show off your personality offline.
How to create your own "Facebook Business Card"
- Open "Moo.com"
- Click on "Sign In "
- You can use your Facebook account to sign in or you can create a different account in Moo.
- Simultaneously open your Facebook account on the other tab of browser
- If you are using your Facebook account, then click "Facebook" button in Moo.com
- It will ask for permissions to access your profile. Click "Okay"
- In Moo.com, after you are logged in, click on "Business Cards" drop down menu
- Select "Facebook Cards"
- Now click "Make Cards for Me" option
- In the preview you can see that your profile photo with your cover photo is imported by Moo.
- Set the "Front of cards" section
- Here you can re-size the cover photo by clicking "-" and "+" icons and it will be changed automatically in the preview section below
- Click "Next Step" button
- Now set "Back of Cards" section
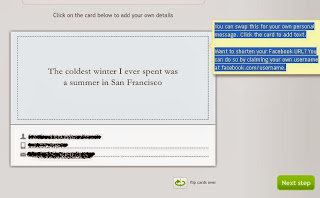
- Enter the space provided for additional information. Below you can see that your Facebook profile name with other details are imported.
- Click the "Flip" card button below to see front and back side.
- As you click the "Flip" button, both sides will be displayed one by one.
- Click "Next Step"
- Its now time for "Final Checklist" . Check the boxes as accordingly.
- Click "Next Step" button after checking all boxes
- The final step is to select the "Country" to send the business card via "Global Mail".
- Lastly click "Checkout".
To get your business card delivered to your location, you have to select the "Shipping options".
Here you have the facility to select the two types of shipping options. They are Express and Standard. By default the option is set to "Standard" and its estimated date of shipping will be displayed. But if you want it to be delivered as soon as possible, then select the "Express" option which will be delivered before. But for that you will have to pay extra charges.
- Later on click "Continue" option.
- Enter the "Shipping Address "
- Enter all the details in the address sections and click "Continue" .
- Enter the "Payment Details" and click "Continue"
This will mail you the created Facebook Business Card to your location specified.


